Wednesday 19 October 2016

Come on baby, light my fire..........

The Great Hall in Marsh Hall needed a fireplace.    I bought a fire surround, logs and dogs but, silly me, the logs were too wide for the fireplace opening.   I therefore had to resort to Plan B - make one.

Using the dimensions of the purchased fireplace but making the opening wider and then diving into my stash of foamboard I came up with this


Three coats of paint and two coats of dark oak varnish later, I had this


Hopefully, once it's in place, it'll look suitably Baronial.


Tuesday 4 October 2016

October Miniatura

Had a great weekend at Miniatura, Birmingham.   I travelled down on the Saturday, fair on Sunday, home on Monday AND I didn't spend all the budget so that can roll on to York in November!

Where I can, I'll list the sellers -


Fabric, The Silk Route;  brass strips, At Home with Mrs Hogarth;  wood moulding, Jennifers of Walsall  and laser cut detail panels, The Dolls House Builder.


Lights, Heidi Ott Miniatures;  plants, The Flower Lady;  woven trug;  resin figures, Eggers Delight;  lock, Sussex Crafts


Fabric, Blue Riband Fabrics;  Fireplace, Victoria Fasken;  decorative fire screens, Elite Petite Interiors;  slipper bath, Sussex Crafts.


I'm not sure yet whether this selection would work better in Marsh Hall or Netherton so I've posted it on both blogs!   The fire surrounds are from Eggers Delight and the chairs from Alison Davies Miniatures.


There were one or two sellers I had hoped to see who were not there which was a bit of a disappointment and there were quite a few items on my carefully crafted list that I didn't get, but I did however manage to make up for that by purchasing items that weren't on the list and some I hadn't even thought of so all in all, a good weekend. 


Thursday 11 August 2016

Getting stoned - a Three Day Event


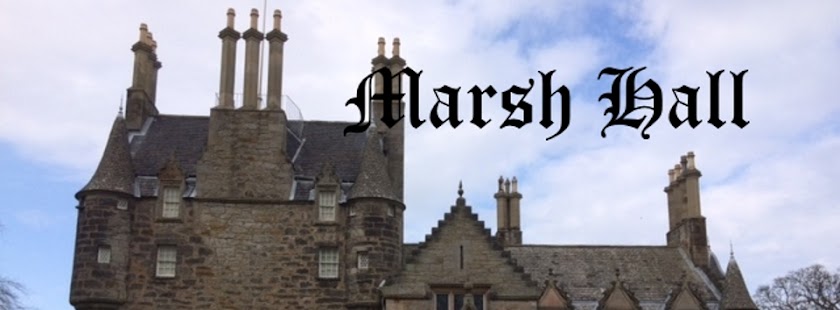
This is Lauriston Castle, Edinburgh and the building I'm taking as visual inspiration for Marsh Hall.


I'm using a Bromley Crafts stencil and compound for the finish and this is how it looked once dry but before any paint was applied.


Day 1

The house had already received an undercoat of watered down muddy brown emulsion,


then, using various "stone" colours I dotted and dabbed with sponges and brushes until I got an effect I was happy with.    This is the sort of finish you could fiddle about with for days/weeks and perhaps never be 100% happy with so you have to tell yourself it's fine and put the brushes down otherwise you could go on  forever 


Part way through the process I decided I didn't want the window surrounds or stonework around the Porch to have a different finish/colour from the main house.

I felt quite "arty" holding the inspirational postcard in one hand and dabbing away with the brush in the other, standing back to check the effect then moving in with another splodge!


As the house will be viewed directly from the front there isn't any special finish at the back, just plain emulsion.   The left hand side wont really be seen either given where the house is situated in the hobby room but the right hand side is more on view and also, because there is an additional section of house on this side, I decided to give the building a Clock Tower.    The table the Hall is on at the moment is 3' wide, the house is just short of that and the overall space available is just over the 3' mark therefore a full height tower was out of the question as it would overhang the surface so this little add-on was created to give a bit of interest and to take the 'blank wall' look away.   


The finish you see is untreated emulsion paint.    I've definitely stopped dotting and dabbing at it (for now, anyway) and the next thing to do is spray it with matt varnish to seal it all.    I'm working on the chimneys at the moment then the Porch will be fixed and it's on to the windows.

Day 2

Following on from yesterday's efforts I decided, after seeing the gray gables and quoins in the cold light of day, that they appeared to me to look too much like a framework round the building so I had another go with the dabbing and dry brushing to tone them down.


I'm happier with that, it doesn't look boxed in as much.


The chimneys got some stone/dry brushing treatment and I think I'm finally ready to apply two coats of matt varnish to seal it all.

My final "stoning" task of the day was to add gravel to the top of the porch and paving slabs to the base.    I'm pleased with this.


Day 3

This day saw the Clock Tower being finished


The bell and house name plaque was attached


I saw this little lion heads with rings idea while watching Monarch of the Glen (research) and thought it was a nice touch 


And, for a bit of panache, the Coat of Arms


This is the property as it stands at the moment.   There are still one or two tweaks to be made and I've had a further couple of ideas relating to the front but these can wait.


Monday 11 July 2016

Roof tiles

This is the Marsh Hall roof -


I've no idea how many square inches it covers and I haven't even bothered to work it out.   I've been debating with myself as to what sort of tile I want.

I knew it wouldn't have a painted finish because the body of the building will be painted.   I also considered the mdf strips but that would mean painting them.    Real slate was out of the question because of the weight and besides, I'd already used them on The Tenement


Richard Stacey's Versi slates were an option and I'd heard good things about them but they would look too uniform on my building.  

I also thought about Peter Clark's tiles.   These are painted card, with cutting lines marked on the back.   I'd used these tiles on my Apples Tea Rooms  and I was very pleased with the effect.  So pleased in fact that I used them again on Netherton.    There was a batch left over that I could have added to but as I wont be at Miniatura until October when I could compare like with like, and the fact that I had already used that particular style - I wanted something different.


Inspiration presented itself during my visit to the York Fair.   Floor tiles!   I saw this on a build being displayed at the show.    

When I first started this hobby with Hambleton Hall I didn't have the great roof debate over which tiles would be best (probably because I didn't know any better, I wasn't on any forums or in contact with any other miniaturists).    I searched the internet and came across some self-adhesive tiles on ebay.   The very thing and so many packs later, job done.


It has since occurred to me of course that these tiles are probably floor tiles cut to size but it works!

Dilemma resolved.   One pack of "slate" self-adhesive floor tiles from the DIY shop later and I'm half-way through tiling the Marsh Hall roof.

For anyone who may be considering this roofing method or who might think, like me, "I never thought of that" this is how I'm doing it.   I've taken a chance by relying on the "self-adhesive" part of the tile.   I did this with Hambleton Hall and unfortunately they had a habit of sliding off but this property was housed in the Conservatory and the heat didn't do the adhesive any favours.   I therefore had to go over it all again and glue the tiles down.   Hopefully (and I'm taking a chance) this wont happen with Marsh Hall as it's not near any heat source.   I'll let you know!

Firstly, arm yourself with two dishes - one for cut tiles and one for backing paper and off-cuts (basically a mini bin);  a metal rule;   sharp knife (the blades will need to be replaced quite frequently);   a pair of scissors and a very sharp pencil.

Take your tile


Mark cutting lines on the back - I measured out my tiles 1" wide by 3/4" (2.54cms x 1.09cms).


Using the very sharp knife, score/cut through the horizontal lines.   I found it easier to use scissors for the vertical marks and store all the bits in your dish.

Starting at the bottom left, and with one full tile, go for it but hang on to all the little offcuts as they'll come in handy when filling in around dormer windows and the like.

In order to keep the line level I didn't pencil mark the roof (which incidentally isn't fixed yet).   I just measured from the tile line I was working on to the top of the roof edge.


Being self-adhesive and having a backing works out quite useful when marking up a smaller tile.   Simply turn it over, mark what's required and cut with scissors.


I've tried very hard to keep all edges neat but sometimes it's not possible, especially at the dormer windows and under the eaves.   This is not an issue as these edges will be covered with lead flashing.

So, after spending the best part of two days "up on the roof", here's my progress so far


Apologies to the seasoned miniaturists who have tiled many roofs.  I just thought there may be one or two newbies out there who may find the above useful (and cost effective!)


Wednesday 22 June 2016

Some progress

I don't think I've ever faffed about with a property as much as I've faffed about with this one.   I had an idea of where I was going with it then I really got into the research which threw up all sorts of different ideas, each one better/different from the last which resulted in me not being able to make up my mind!

I would go into the hobby room and move cardboard around (or at least that's what it felt like) with no progress of any note being made.

There's been a lot of "I want this but can't do it until I do that" and "if I do this, then I can't do that" and on it went.

Another factor delaying the progression of this was my sister Valerie.   Valerie suggested I watch Monarch of the Glen which was filmed here Ardverikie.   I hadn't watched the programme when it was shown but I trusted her judgement and duly ordered the series.    I have therefore been spending my time doing "research" and it has thrown up all sorts of other exterior ideas so really I'm no further forward!

Here, nothing is fixed, just all propped up.   Do I go with an additional oriel window?


How about a squared off bay?   The picture I'm using for inspiration here is Abbotsford, home of Sir Walter Scott.


I definitely wanted crow stepped gables


At last, at least one decision has been made and I'm stoning the walls using Bromley Craft Products  stencil and compound and I'm going with the squared off bay (I think!)


Tuesday 7 June 2016

York Fair

Firstly, thank you to everyone who posted on this new blog.   I'm really excited about this one and am full of ideas.   Whether or not they happen will be anyone's guess but it's really nice to know folk are interested and keen to see what will be coming next.

It's great fun shopping for minis relating to a new property when all the ideas are buzzing around (in fact it's great fun shopping for minis, period) and I wasn't disappointed with my trip to the York Fair at the weekend.    I arrived in York early enough to allow myself an afternoon of RL shopping and that wasn't disappointing either - I love York!

The one thing I didn't get was the item at the very top of my list namely, panelling.   Out of stock, but I should hear from the seller the minute it's readily available again.   Here' are all my purchases and where I can remember, I've noted the name of the seller (the flooring in the background is for another property) -


Chandelier Matlock Miniatures;   decorative plaster items;  table decoration (the candles are too tall!);  fabric;  lion's heads J & A Supplies;  fretwork screen and door Dolls House Direct;  fretwork ceiling decoration.


During my foray round the shops on Saturday afternoon I came across these little items from, would you believe it, an Armoury shop.   This is a bonus!    I am so pleased to be able to say that Marsh Hall now has a motto "By Virtue Safe" and a Coat of Arms.   How swanky is that?    I've no idea how they will fit into the scheme but fit they will.   The little picture/carving is a magnet and the perfect size for a wall decoration.

Saturday 7 May 2016

A new property.

A new property has arrived in Irene-land. 

I prefer to work with two projects.   Whilst waiting on inspiration/parcels for one, I can get on with the other.   I also don't want Netherton to be completed too soon as I am having so much fun working on it!

This new venture is a property from Dolls House Direct - a Victorian Gothic.   Not as large as Netherton but enough to keep me out of mischief for a while.   I certainly have a lot of research to do with this one and I'm looking forward to that very much.


If you're wondering how I managed to arrive at the name, well..........my sister and I recently discovered a relative we had no idea we had which triggered all sorts of genealogy questions.   I thought it would be quite nice to remember this individual by naming my property using his name, Marshall.    I punted the idea over to sister Valerie who came up with Marsh Hall - genius!   Why did I not see that myself?    So, welcome to Marsh Hall.

As for the style - a lot of thought has been going into that.   Given it's design I have been researching the differences between 19th century Gothic Revival (think the Palace of Westminister and Big Ben) and Scottish Baronial   What were those differences?    It would appear to me that the Gothic Revival style was more ecclesiastical and Scottish Baronial more domestic - being a Scot also helped swing the decision so Scottish Baronial it is.  (Balmoral Castle, Blair Atholl Castle and Abbotsford).   All very grand but Marsh Hall will be more Abbotsford than Balmoral!

Balmoral Castle.jpg

Balmoral Castle, Aberdeenshire

Blair castle - facade.jpg

Blair Atholl Castle, Perthshire


Abbotsford, Scottish Borders (Home of Sir Walter Scott)

Another building influencing my decision on where to go with this is Lauriston Castle, a much smaller domestic property in Edinburgh (and just a 15 minute drive from my home) which has some lovely exterior features I would like to include.


Lauriston Castle

There's not a lot to see by way of any progress other than the beginnings of the build and an undercoat of paint.   I decided to do away with the staircases and at the moment I'm playing with walls.


So - welcome to all who join up to follow yet another of my blogs.   It's lovely to see you here and I hope you enjoy my journey with this latest property.